In this Knowledgebase article, we walk you through the different ways of adding a signature into Outlook.
Manually adding new signatures
To manually add a new signature in Outlook, follow the steps below:
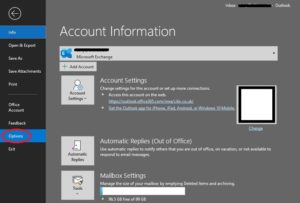
- Click on ‘File’ in the top-left corner of Outlook, and select ‘Options’

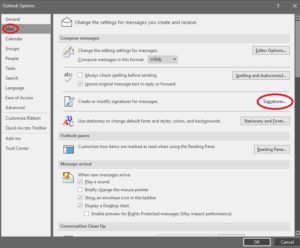
Select ‘Mail’ on the left-hand side & select ‘signatures’.

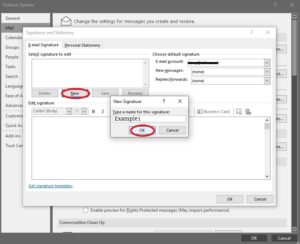
- Select ‘New’ and enter the signature name, then click ‘Ok’

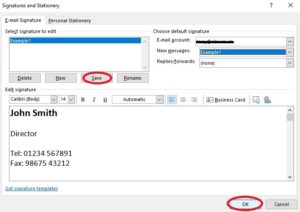
- Enter (or copy & paste) your signature in the ‘Edit signature’ field. Then click ‘Save’. You can then assign the signature to new messages and/or Replies, using the drop-down boxes on the right. Once done, select ‘Ok’.

Automatically adding new signatures
To automate this process we provide an email signature management platform. This provides organisations with the ability to centrally manage email signatures to ensure consistency across their business.
The main benefits of an email signature management platform are:
- Provides all users in the organisation with consistent signature branding.
- Ensures coherent use of company identity and logos.
- Enables an easy way to add highlighted email signature elements such as:
- social media icons,
- promotional banners for offers, events or campaigns,
- promote relevant email links or partner logos, and
- ensure all email communications have any necessary legal disclaimers.
- Ensures your business signature is sent from ALL devices, including smart phones, tablets, and Macs.
- Supports your mobile workforce.
- Creates a signature library that can be scheduled to align with events, campaigns, or seasonal holidays.
- Creates tailored signatures for different departments within your organisation.
Contact us on 01252 758244 or sean@cilix.co.uk if you’d like to see this in action or to discuss how it can benefit your business.
